Manual Lift Transfers
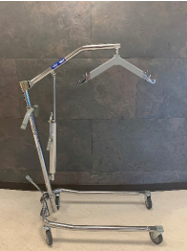
*Before using the lift to transfer the person you are helping, practice with someone else. Also, be sure there is enough space in the room to move the lift to desired location. It is easiest to move the lift if there are no throw rugs or obstacles in the way.
Most lifts have an instructional video on their website. It is recommended to view the video of the particular company/brand before using the lift.
Be sure you have the correct style and size of sling (refer to the lift manual for guidelines on sizing of the sling).
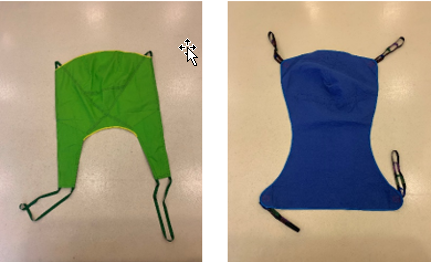
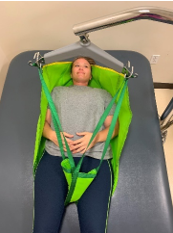
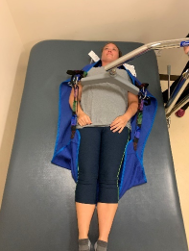
Sling A Sling B
Raise the height of the individual’s bed (if able) to protect your back. Assist the patient to roll onto their side.
Typically, the sling should be placed from the top of the shoulders to behind the knee.
Depending on the brand of sling, this may vary. Refer to the manual or website.
Roll one half of the sling vertically toward the center, and then tuck it underneath the person.
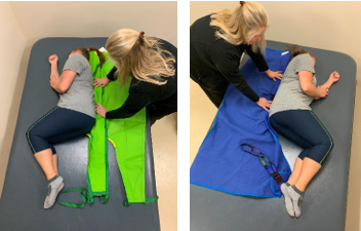
Assist them to roll onto their other side. Unroll the remainder of the sling under them and then assist them to roll onto their back.
*For sling type A:
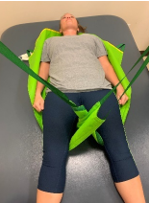
Widen the legs of the base of the lift then position the sling bar over the individual’s chest.
Lower the lift and securely attach all 4 corner straps of the sling to the lift bar.
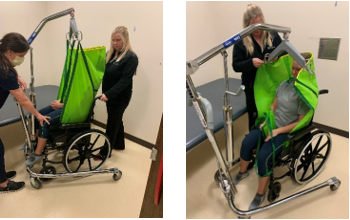
*For sling type B:
Be sure that the chain attached at the shoulder is shorter than the chain attached to the lower end to promote a sitting position when the person is lifted.
Lift the person up by pumping the handle. Make sure their hips are high enough up to clear the surface. You may need to support the individual’s legs if they are unable to lift them or if they are in pain. Once lifted, turn the individual so that they are facing the lift and their legs are straddling the center bar of the lift.
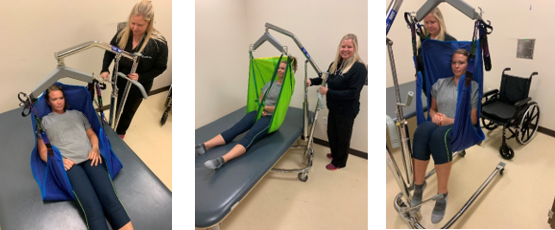
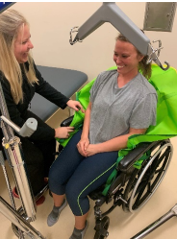
Slowly move the lift to the desired location. Position the individual so that they will have back support when lowering down into a sitting position (otherwise they may slide forward in the chair).
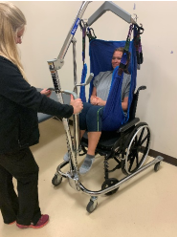
As you lower the individual into position, push their hips slightly back towards the back of the chair for a comfortable sitting position. Remove the sling from the lift by detaching the four corner straps.
*Sling type A: Slide the thigh straps of the sling out from under their legs to avoid causing pressure on the skin.
*Sling type B: Remains under them.
When ready to transfer again, reattach all four corner straps. (Remember to replace thigh straps and crisscross the leg straps for sling type A).
Check that the straps are not twisted and reverse the process.